Seamax Traditional H.R. Air Valve or Leafield C7 Air Valve with Sealant Reinforcement Package for Inflatable Boats

Notice to Buyer:

Valve Replacement work will be related to the thread of the air valve when you want to screw it in.  Since the inner part cannot be simply replaced, so the new replacement valve needs to match the old valve seat (thread) inside the chamber. No one want to cut the chamber to replace the whole valve including the inside part. So please make sure your boat is a Seamax boat or valve sample model before purchase. otherwise you can always chat with us with your old valve parts picture to verify.

If your boat is a Seamax boat, best to provide your detail boat model & HIN and even a valve picture, so it will help us to located a right version air valve for you. If your boat is not a Seamax boat, detail photo of your boat's air valve will help. If we don't have the same parts for you, we will let you know or order can be full refund before shipped.

Regular Valve Service instruction (For most popular models)


  • If the air leaking from the middle, try to tighten up the screw at the middle and spray some WD40 into the opened valve to turn up the seal. If not working then this valve needs to take out inspection and change
  • If the air leaks from the valve and chamber edge, try to tighten it up to see any help. Do this job first when the chamber is fully inflated. Otherwise, you can open the valve, inspect the underlay round PVC and make sure not separated. If this is the case,  you get to re-glue it again. (wait 24 hours to firm, see instructions of boat repair kit)
  • best to add marine sealant to the valve edge like our website suggestion to ensure the job is well done. (no suggest 3M product here since too strong)
  • It is easier to loosen the valve when the chamber is fully inflated. Remember the valve seat inside the chamber won’t be exchanged. So best fully deflate the chamber when final open the valve.
  • If your job takes more time or working with more chambers at the same time, use a short fishing line to secure the valve seat no falling into the chamber. Otherwise, you can use a long stick with duck tape at the end to reach the valve seat inside the chamber.
  • Learn from the new valve before starting. When screwing in your air valve back, make sure not to turn the valve seat to the wrong (small) side. Otherwise, air leaking will be seen no matter how tight you make.
  • When use the plastic valve tool, you need to put one hand to hold it down, make sure the tool stay at the valve socket when bending. Otherwise, it is easy to break its teeth.


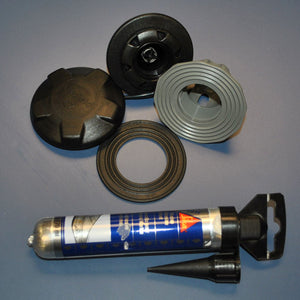
Air Valve Options & Air Tight Reinforced Sealant Package:

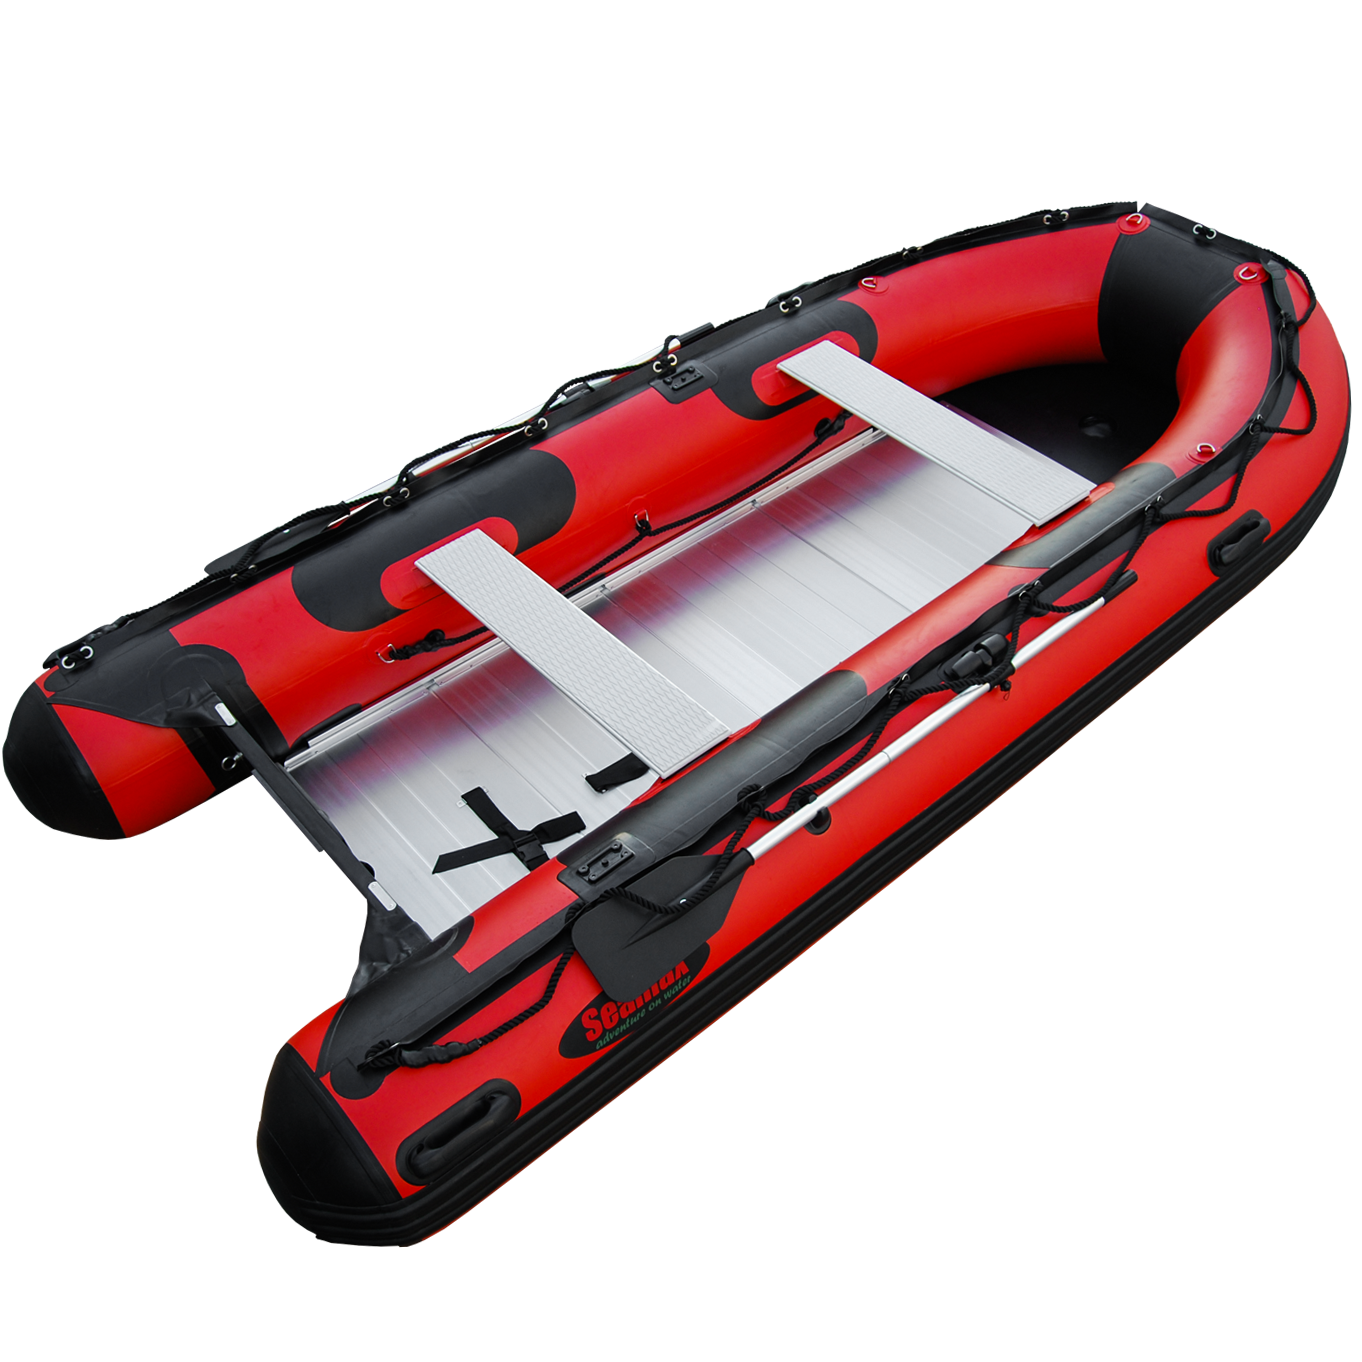
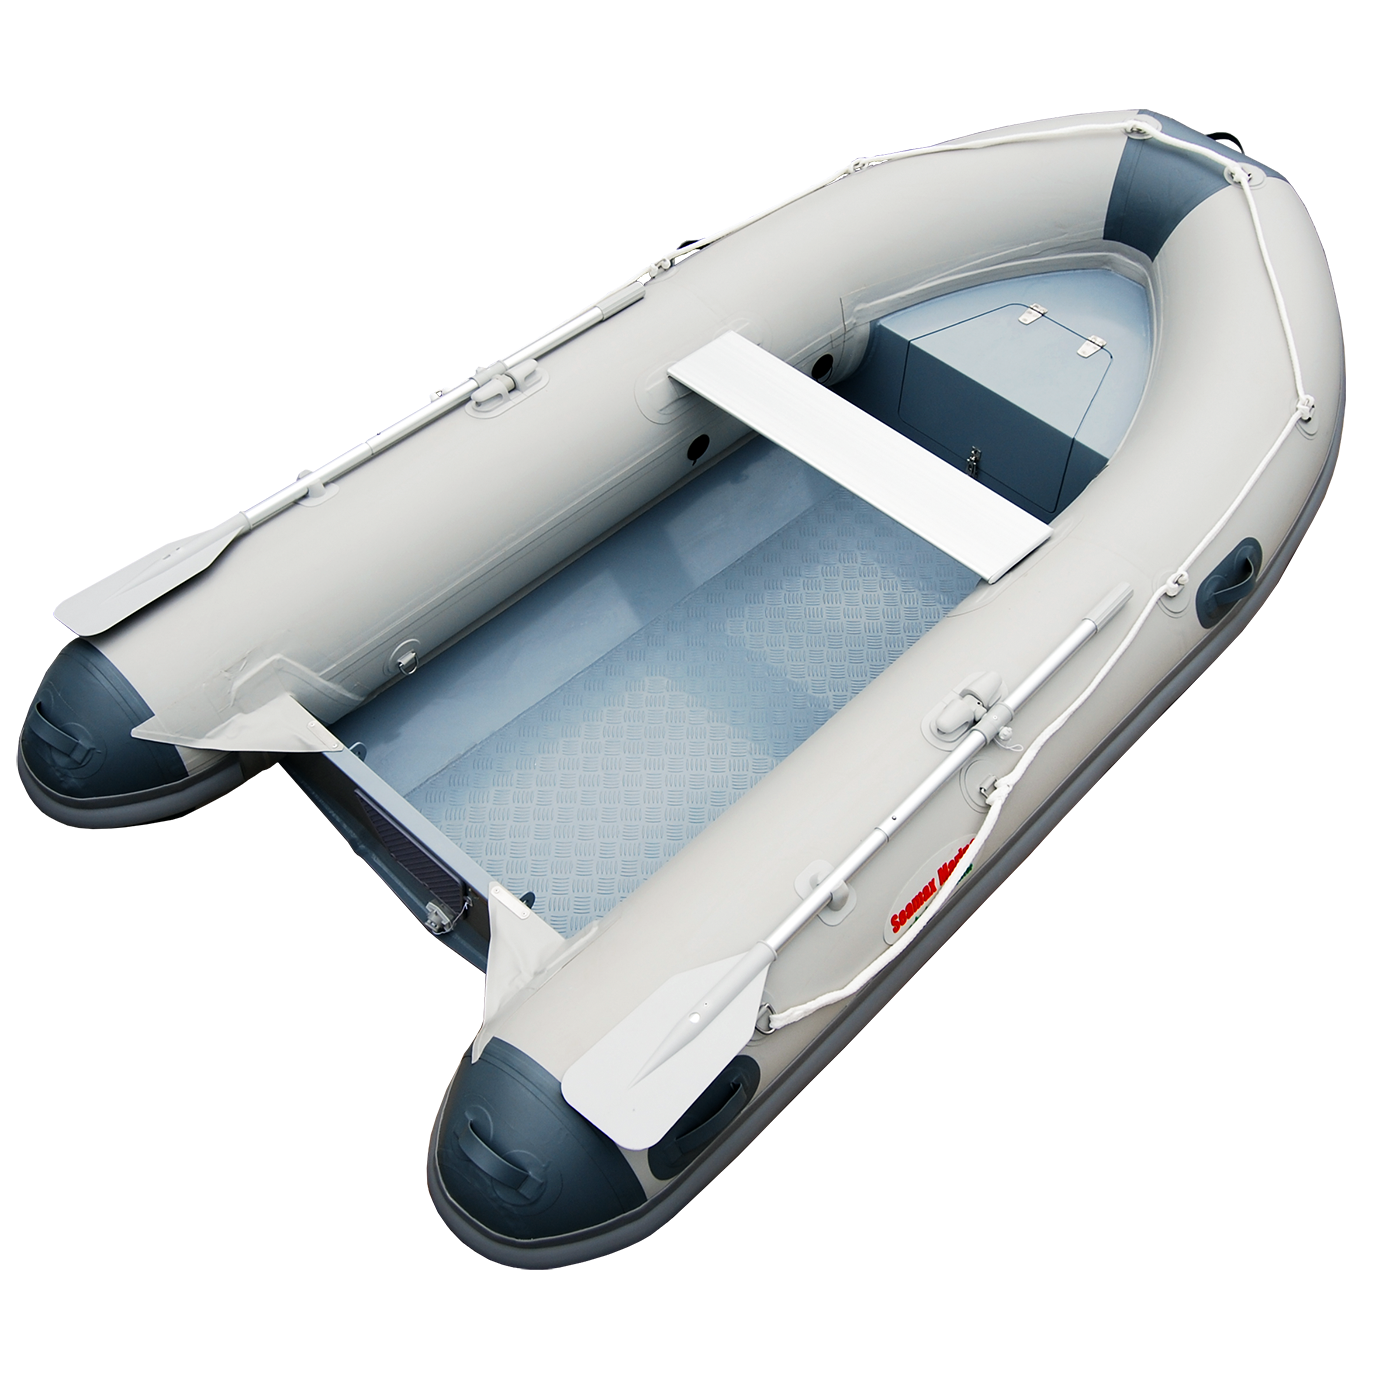
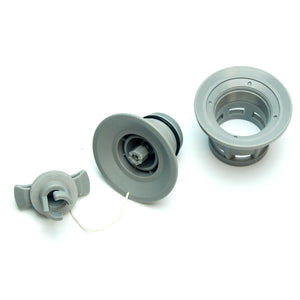
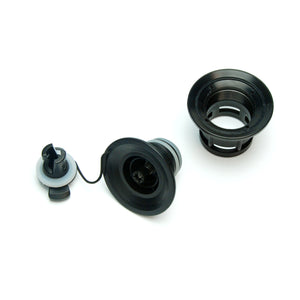
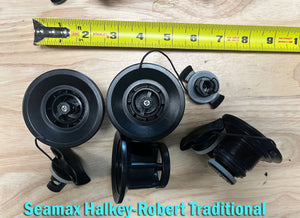
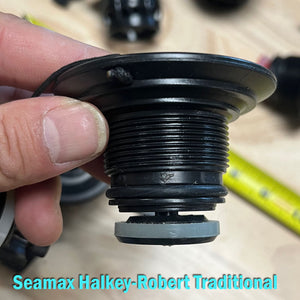
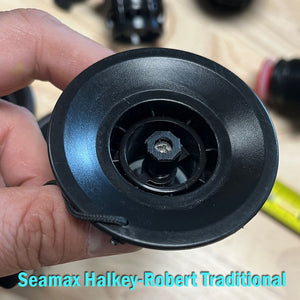
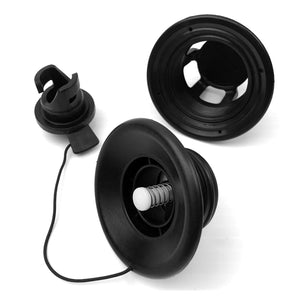
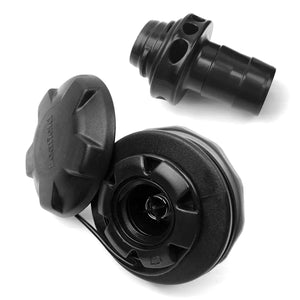
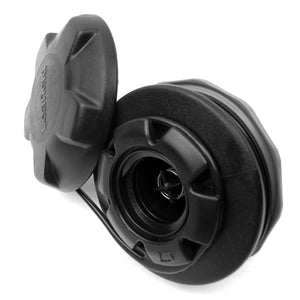
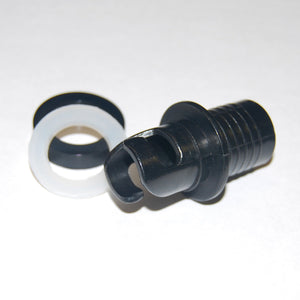
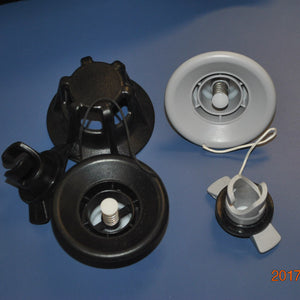
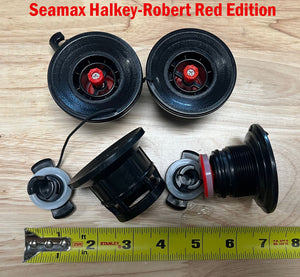
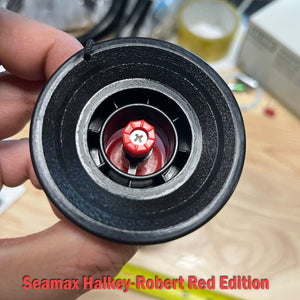
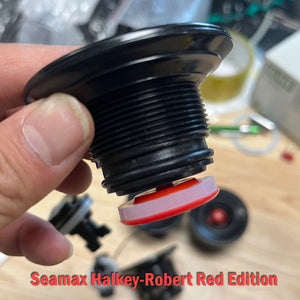
- Halkey-Roberts type or Bravo type Air Valve for one set for Seamax inflatable boats in selected model years. This air valve cannot be compatible to all made or all Seamax models. 

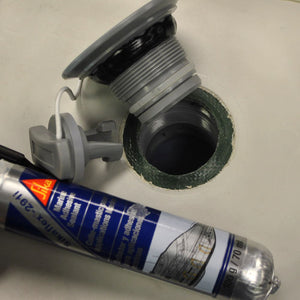
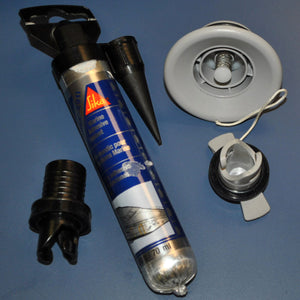
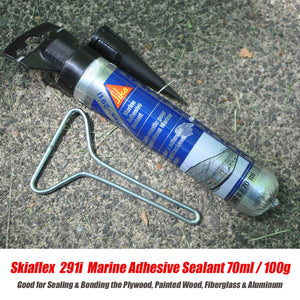
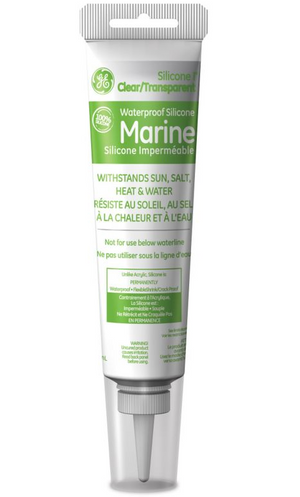
- Sikaflex 291i or GE marine sealant. 3.5oz pack. When apply only the Sealant (5-10g) on the thread surface of the valve before screw in. It can help the air valve to get perfect air tight but won't stick the valve parts together. Air valve can be opened again for service in the future.

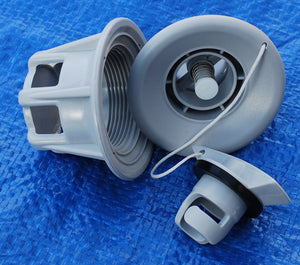
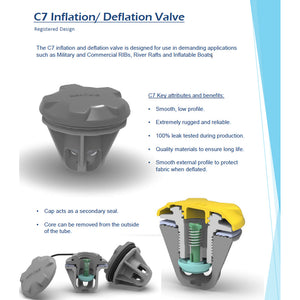
-  Leafield C7 Inflatable/ Deflation Valve- This valve is designed for use in demanding applications such as Military and Commercial RIBs, River Rafts, and  Inflatable Boats. C7 Key attributes and benefits: Smooth, low profile; Extremely rugged and reliable; 100% leak tested during production; Quality materials to ensure long life; Smooth external profile to protect fabric when deflated; Cap acts as a secondary seal; Core can be removed from outside of the tube.

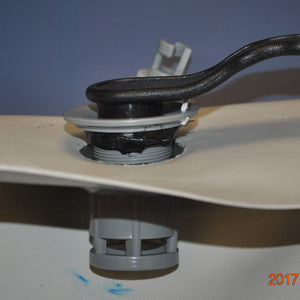
Air Valve Replacement Quick Instruction

  • To replace the air valve, you can first inflate the chamber to 3 PSI. First to loose the valve when chamber (Boat or SUP) inflated, use the valve winch to turn it by counter-clockwise, pressure down the tool by your another hand in case it slip out. You may turn it for about 1 round until spinning.
  • Lay down the chamber (Boat or SUP) on the flat floor, Manually deflate the chamber completely before you can unscrew the air valve out.  You don’t need to change the valve seat that inside the chamber. At the mean time don’t let it fall into the chamber, otherwise it is hard to get it back to the original position.
  • Optional to add some silicone to air valve thread. Or if you used to have air leaking at the valve edge before and tight up the valve no help, then you should add some on to get it a better seal and fixed.  If you add the silicone to your valve, we suggest to keep 24 hours before you next use. And chamber pressure best to keep 1 PSI after valve replaced.
  • Same way to screw in the air valve to the valve seat. First by hand until no more moving. Then you can use the valve winch to keep turning. Also holding the bottom tight via the chamber. Maybe you can turn 1 or 2 round until no more.
  • Inflate the chamber to 3 PSI. and you can keep using the winch to final turn it tight. You may be able turn half round or more until final tight.
  • When you turn the winch very hard, always remember use another hand to pressure it down toward the valve, the tool slip out from the valve may cause its teeth damage.
  • Use the 5% liquid soapy water to check the air leaking. Easy to use a water bottle and drill a pin hole (1/64”) on its cap as a DIY tool.


General Instruction of Sealant:

Professional grade marine adhesive/sealant used by boat builders and yards to bond and bed boat components structurally. Fast strength build-up overnight. Use above and below the waterline. Comes with nozzle. All purpose adhesive sealant, bond to hull and structural members. Bedding compound, light bonding, fast-cure polyurethane sealant. 

If a partial unipack remains, you can simply squeeze the air out of the tube using the included tool, thereby extending the shelf life of opened product. Includes application nozzle and dispensing/storage tool

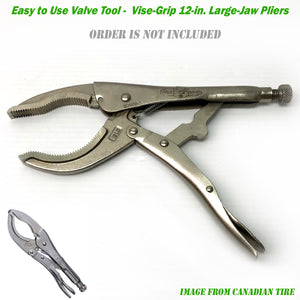
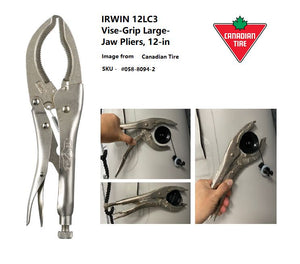
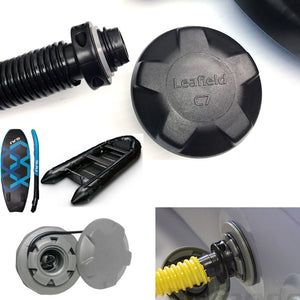
If you can't not find your valve tool or it was broken, you can use a Jaw Pliers to open your valve.